
Top Picks


Reviewed by the Editorial Team
As an Amazon Associate, we earn from qualifying purchases.
Finding the right how to organize a dresser and wardrobe comes down to matching watt-hours to your actual power needs.
Last Updated: June 2026 | Written by the Editorial Team | 8 min read
> THE 30-SECOND ANSWER: Shrink the volume of clothing first, file-fold everything vertically, zone each drawer by function, and use dividers that touch both the front and back wall. That's the formula. Everything else is detail.
The Bedroom Drawer Confession
If you've ever opened your dresser, sighed at the avalanche of half-folded shirts, and slammed it shut to deal with later — this guide was built for you.
I've reorganized my own bedroom storage four times in six years. Three of those attempts collapsed within a month. The fourth one — the one I'll walk you through here — has held up for almost two years, including through a cross-state move and two seasonal swaps.
Here's what actually worked, what wasted my money, and how to apply it to whatever furniture you already own.

The Numbers That Changed Everything
Before we dive in, look at the stats that reshaped how I think about drawer storage. These aren't fluff — they're the reason the system works.
| The Reality | The Number |
|---|---|
| Clothing buried by horizontal stacking | ~70% |
| Wasted vertical space in standard wardrobes | ~40% |
| Capacity gain from file-folding (my drawer) | +57% (14 to 22 shirts) |
| Items the average closet hasn't touched in a year | The majority |
> KEY TAKEAWAY: You don't need bigger furniture. You need a smarter system inside the furniture you already own.
Why Most Dresser and Wardrobe Setups Quietly Fail
Most people fail at bedroom storage for one painfully simple reason: they organize around the furniture instead of around their clothes.
They open a six-drawer dresser, dump folded shirts in the top drawer, jeans below, socks in the small one, and call it done. Within ten days the shirts are a heap, the jeans are wrinkled, and the socks have eaten the underwear drawer.
Sound familiar? You're not alone — and you're not the problem. The method is.
The Three Hidden Saboteurs
The real challenge is threefold:
- Horizontal stacking — the default we all learned — buries 70% of your clothing where you can't see it.
- Most drawers are deeper than they need to be for the items inside, which lets piles tip over the moment you remove the top item.
- Wardrobes typically come with one rod and a single shelf, wasting about 40% of the vertical space you actually paid for.
> PRO TIP: Before you buy a single organizer, audit what's broken about your current setup. Is it the furniture, or the folding method? Nine times out of ten, it's the folding.
Watch It In Action: The Folding Method That Changed Everything
If you've never seen the file-fold method demonstrated in real time, this is the clearest walkthrough I've found. It's worth four minutes of your life — I promise it will change the way you open a drawer forever.
The Step-by-Step Blueprint: From Chaos to Calm
Step 1: Empty Everything (Yes, Truly Everything)
Pull every single item out of the dresser, chest of drawers, and wardrobe. Pile it on the bed.
I know this looks insane. I know you'll regret starting. Do it anyway. If you skip this step you're not organizing — you're just rearranging clutter.
When I did this last time I found three identical black t-shirts I'd forgotten I owned, a hoodie I'd been searching for during two whole winters, and a pair of jeans with the tags still attached from 2022. That pile on the bed is the truth your drawers were hiding from you.
> REALITY CHECK: The pile will look bigger than the furniture. That's the point. You can't make smart decisions about what stays until you see the full inventory in one place.
Step 2: The Brutal Edit
Now comes the part everyone wants to skip. Touch every single item and ask three questions:
- Have I worn this in the last twelve months?
- Does it still fit the body I have today, not the one I had three years ago?
- If I saw this in a store right now, would I buy it again?
Most people cut 30 to 50% of their wardrobe in this step. That's not a loss. That's the freed-up square footage your remaining clothes have been desperate for.
Step 3: Zone Each Drawer By Function, Not By Category
Here's the shift that took me four attempts to learn: don't think t-shirts, sweaters, pants. Think morning routine.
Which drawer do you open first when you get dressed? That's your prime real estate. Top drawer = daily essentials. Mid drawers = weekly wear. Bottom drawers = seasonal and occasional.
For most people, the layout that works is:
- Top drawer — underwear, socks, sleepwear, daily basics
- Second drawer — t-shirts and tops (file-folded)
- Third drawer — sweaters and bulkier knits
- Bottom drawer — jeans, joggers, off-season storage
Step 4: Master the File Fold
This is the technique that unlocks the 57% capacity gain. Instead of stacking shirts horizontally so the bottom ones disappear forever, you fold each item into a small rectangle and stand it upright in the drawer — like files in a filing cabinet.
The rules:
- Every item should stand on its own without flopping over.
- You should be able to see the top edge of every garment at a single glance.
- Removing one item should not disturb its neighbors.
Step 5: Lock It In With Dividers
This is the step that separates a system that lasts from a system that collapses in three weeks. Use dividers that reach from the front of the drawer to the back wall.
Short dividers slide. Long dividers hold. Bamboo expandable dividers are inexpensive, look beautiful, and adapt to whatever drawer width you have.
> EXPERT TIP: Buy adjustable dividers, not fixed ones. Your wardrobe will shift seasonally, and the dividers need to move with it.
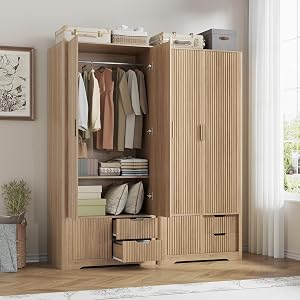
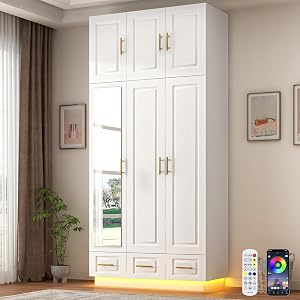
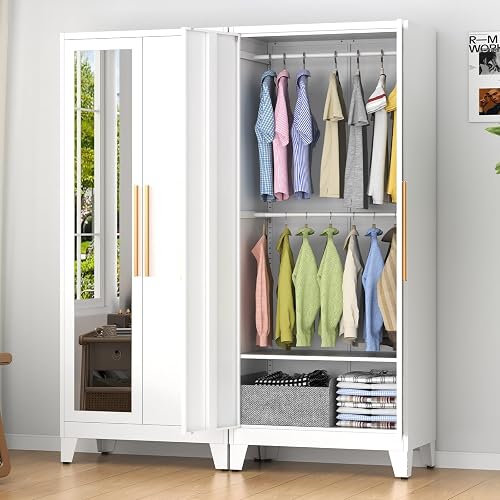
The Wardrobe Playbook: Reclaiming Your 40% Wasted Space
If your wardrobe has one hanging rod and one shelf above it, you are using less than 60% of its potential. Here is how to fix that without buying a new wardrobe.
Double Your Hanging Capacity
A second tension rod hung two-thirds of the way down doubles your hanging space for shirts, blouses, and folded trousers. Cost: under twenty dollars. Capacity gain: roughly double.
Reserve the top rod for longer items — dresses, coats, full-length pants. The bottom rod handles everything from your waist up.
Use the Floor (Strategically)
The floor of your wardrobe is the most underused real estate in your bedroom. Add two or three pull-out fabric bins for off-season storage, shoes, or bulky knitwear. Stackable bins with labels turn dead space into a second dresser.
Conquer the Door
The inside of a wardrobe door fits an over-the-door organizer that holds belts, scarves, ties, and small accessories — items that otherwise eat drawer space and tangle into knots.
A Second Look: The Wardrobe Makeover That Inspired Mine
This is the video that finally pushed me to stop tweaking and start rebuilding from scratch. The before-and-after is genuinely stunning, and every technique she uses is replicable in a regular bedroom with a regular budget.
The Five-Minute Weekly Reset
No system survives without maintenance. The good news: maintenance for this one takes less time than brushing your teeth.
Every Sunday night, give yourself five minutes:
- Refold any item that has flopped over in the drawer.
- Return any stray clothing to its correct zone.
- Note any item you didn't wear this week — if it happens three weeks in a row, it goes in the donate bin.
The Mistakes That Will Tank Your System
I made every one of these. Save yourself the months I lost.
- Buying organizers before editing. You will buy the wrong size, the wrong count, and the wrong style. Edit first, measure second, buy third.
- Mixing seasons in one drawer. Winter sweaters and summer tanks should never share a zone. Store off-season clothes in under-bed bins or the top wardrobe shelf.
- Overstuffing. A drawer should be 80% full at most. Leave room for the system to breathe.
- Skipping labels. If three or more people use the bedroom, label every zone. Memory is not a system. Labels are.
- Forgetting the maintenance. A perfect setup unmaintained becomes a worse mess than where you started, because now you have to undo the system and clean up.
Frequently Asked Questions
Do I need to buy expensive organizers? No. Bamboo expandable dividers run about fifteen dollars per drawer, a second tension rod is under twenty, and pull-out fabric bins are ten to fifteen each. A complete bedroom upgrade typically lands under one hundred dollars.
What if I share the dresser with a partner? Assign vertical zones, not entire drawers. Each person gets their half of every drawer using a long divider. This keeps both partners using the prime top-drawer real estate equally.
Does file-folding actually work for sweaters and bulky items? Yes, but with a caveat. Heavy knits should be folded into thicker rectangles and stored in shallower stacks of two or three — not stood upright like t-shirts. Use a separate bulky-knit drawer for these.
The Bottom Line
Your dresser isn't broken. Your wardrobe isn't too small. Your closet isn't cursed.
The system you inherited — horizontal stacks, mystery drawers, one lonely shelf — was never going to hold up under real life. Swap it for a vertical, zoned, divided setup and you'll spend less time folding, less money replacing forgotten clothes, and more mornings actually enjoying the room you sleep in.
Start with one drawer. Just one. See how it feels by Wednesday. The rest of the house will follow.
Key Takeaways
- Choosing the right how to organize a dresser and wardrobe means matching capacity and output ports to your actual devices
- Always check actual watt-hours (Wh), not just watts — runtime depends on Wh, not peak output
- Also covers: dresser drawer organization ideas
- Also covers: wardrobe storage hacks
- Also covers: chest of drawers folding guide
- Compare price-per-Wh across models to find the best value for your budget